Automatic Three-Circle Calibration
Overview
Automatic three-circle calibration calibrates the pixel scale by automatically recognizing standard circles in the Vision Area. Compared to manual three-circle calibration, the automatic method reduces manual effort and improves calibration efficiency.
Important
Automatic three-circle calibration is only available on SP Fully Automatic Series machines. EV Semi-Automatic and C Manual series machines do not support this feature. Please use Manual Three-Circle Calibration instead.
Prerequisites
- Verify that the machine is an SP Fully Automatic Series model
- Prepare a standard calibration target with clearly visible circle outlines
- Ensure the calibration target surface is clean, with no visible scratches or stains
- Place the calibration target within the machine's measurement range
Steps
Step 1: Enter Automatic Three-Circle Calibration
- Click Calibration in the menu bar
- Select Vision Calibration - Auto Three Circles
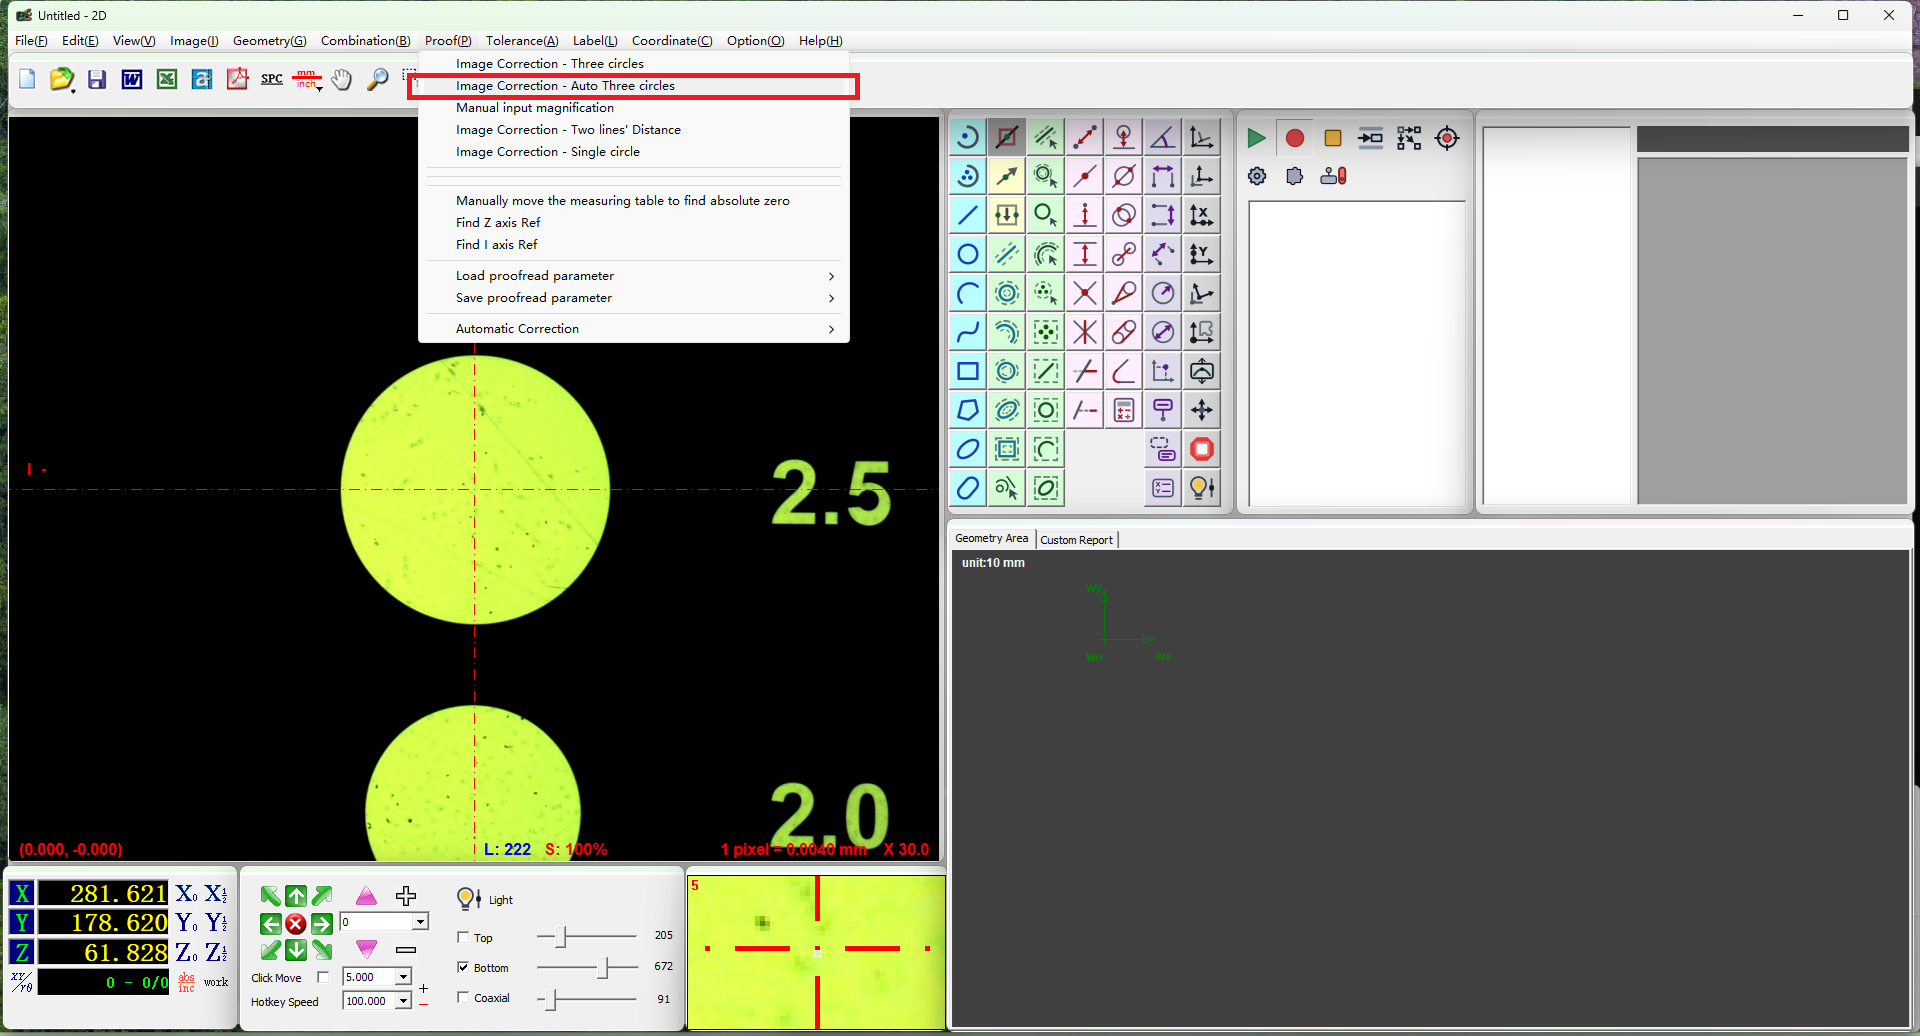
Step 2: Generate Standard Circles
- Find a standard circle in the Vision Area
- Position the standard circle within the circle frame
- Click the left mouse button to generate a circle
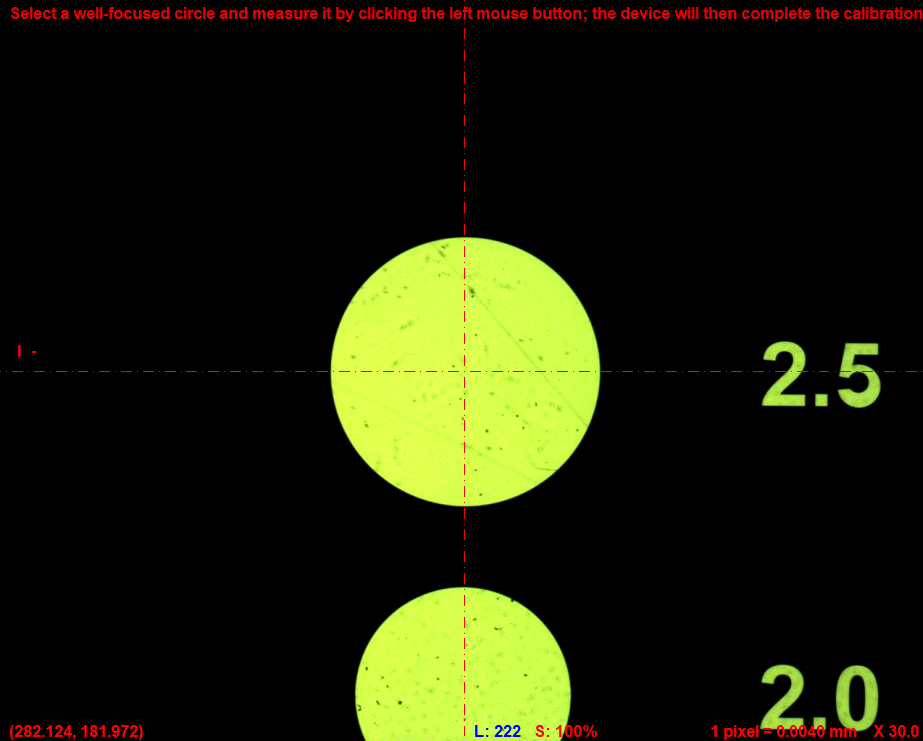
- Move the stage to find a second standard circle and generate it in the same way
- Generate a third standard circle
Step 3: Complete Calibration
After generating three standard circles, click the right mouse button to confirm. The software will automatically calculate and complete the calibration.
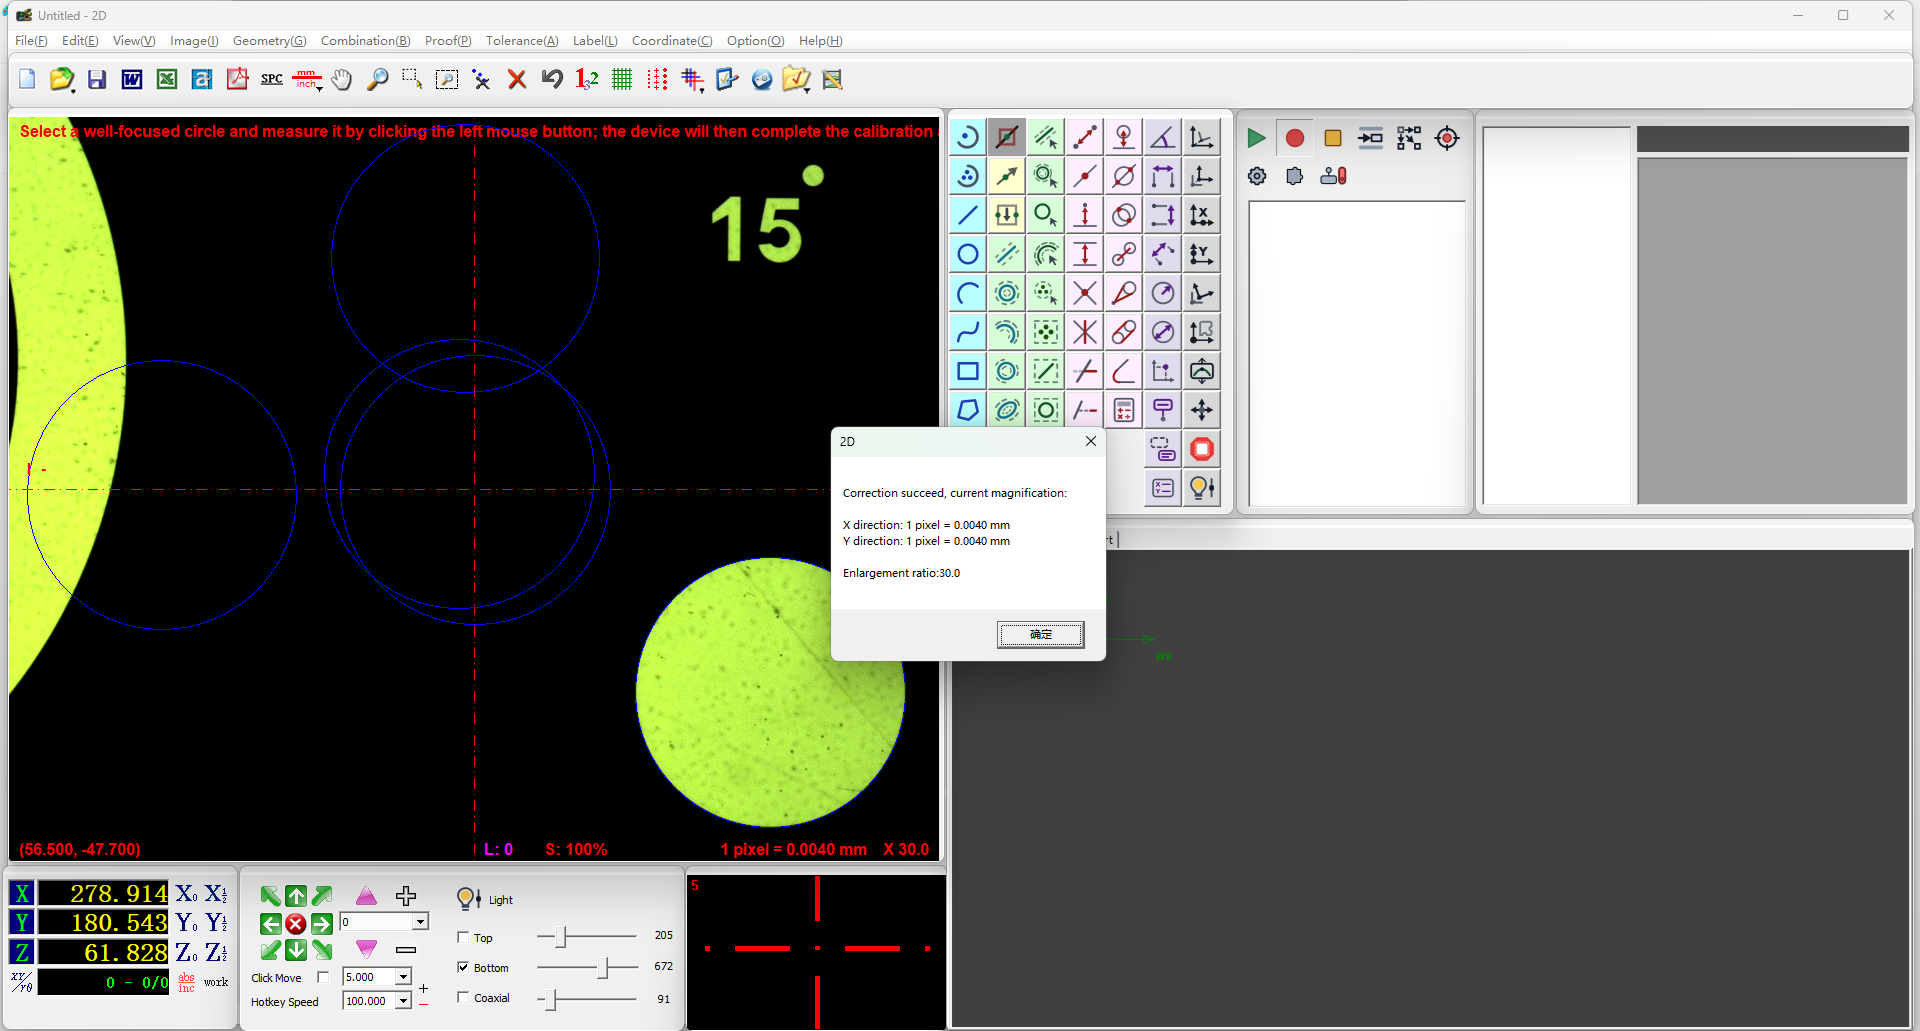
Note
After automatic three-circle calibration completes, the software automatically updates the pixel scale, and subsequent measurements will be calculated based on the new calibration parameters.
Verification
After calibration, you can check the updated pixel scale values in the relevant software interface to confirm that the calibration has taken effect.
Notes
- This feature is only available on SP Fully Automatic Series machines; use manual three-circle calibration for other series
- The three circles should be distributed across different positions in the Vision Area to improve calibration accuracy
- Make sure each circle is fully visible within the circle frame before clicking the left button to generate it
- If a generated circle is unsatisfactory, you can regenerate it before proceeding
- Calibration must be redone after changing magnification or camera parameters