Magnifier
Overview
The magnifier provides a localized zoomed view of the Vision Area, helping you inspect fine workpiece details, pick points precisely, and identify edge contours. The magnifier area shows a real-time enlarged image of the area near the cursor.
Steps
Step 1: View the Magnified Image
- Select any measurement tool in the Measurement Bar, such as Manual Line
- Hover the mouse over the Vision Area — the Magnifier Area will display a real-time magnified image of the area near the cursor
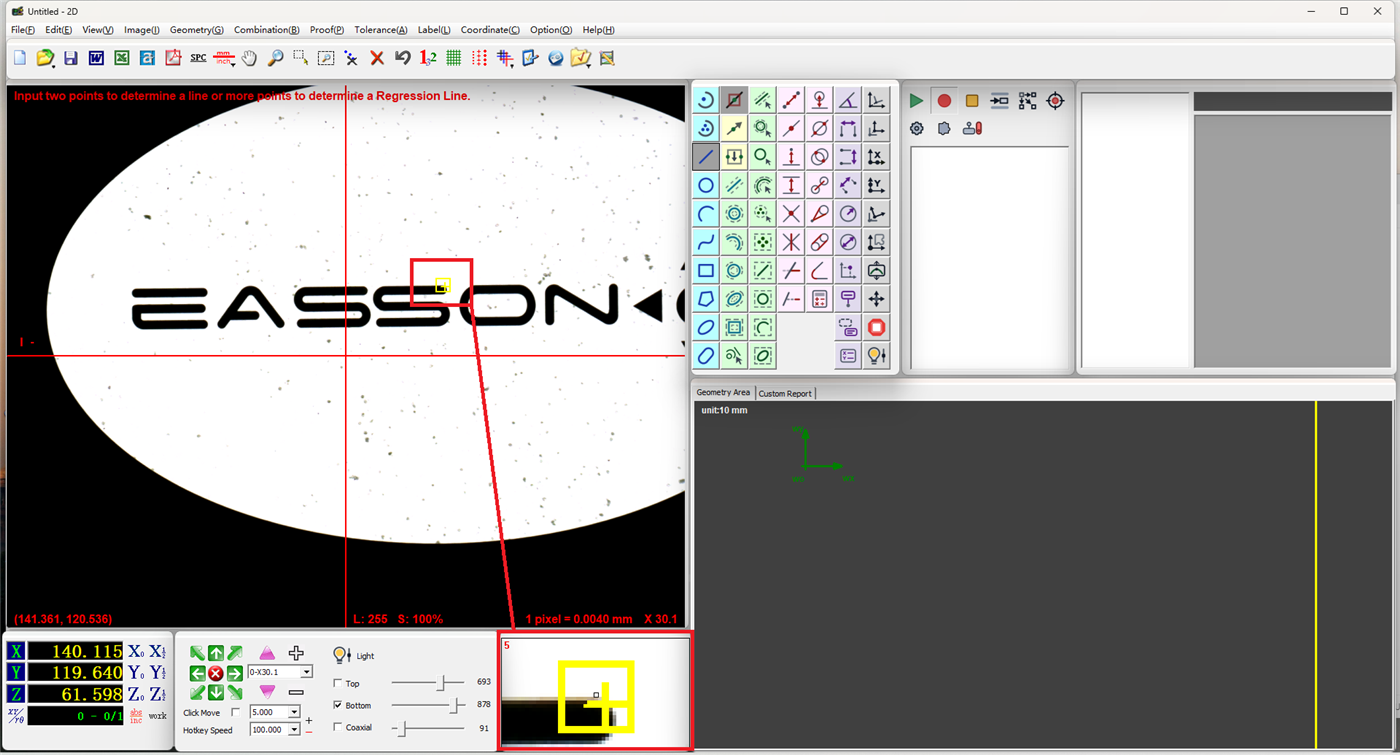
Step 2: Adjust Magnification Level
- Left-click the magnifier area: Increase magnification
- Right-click the magnifier area: Decrease magnification
Note
Choose an appropriate magnification level to precisely observe workpiece edges and fine features. Excessively high magnification may result in a very narrow field of view — adjust as needed.
Notes
- The magnifier is automatically activated when a measurement tool is selected; no separate activation is required
- The magnifier shows a localized view at the cursor position to assist with measurement positioning
- The default magnification level may vary at different optical magnifications