Concentricity Calibration
Overview
Concentricity calibration establishes a unified measurement reference across different magnifications. Through lens concentricity correction, measurement results remain accurate and consistent at all magnification levels.
Important
This method applies to EV Semi-Automatic Series and C Manual Series machines. SP Fully Automatic Series machines have a dedicated full magnification calibration procedure.
Prerequisites
- Controller modification permission has been obtained from your equipment supplier
Steps
Step 1: Open Manufacturer Settings and Reset the Crosshair
- After obtaining controller modification permission, open the manufacturer settings
- Reset the crosshair in the manufacturer settings
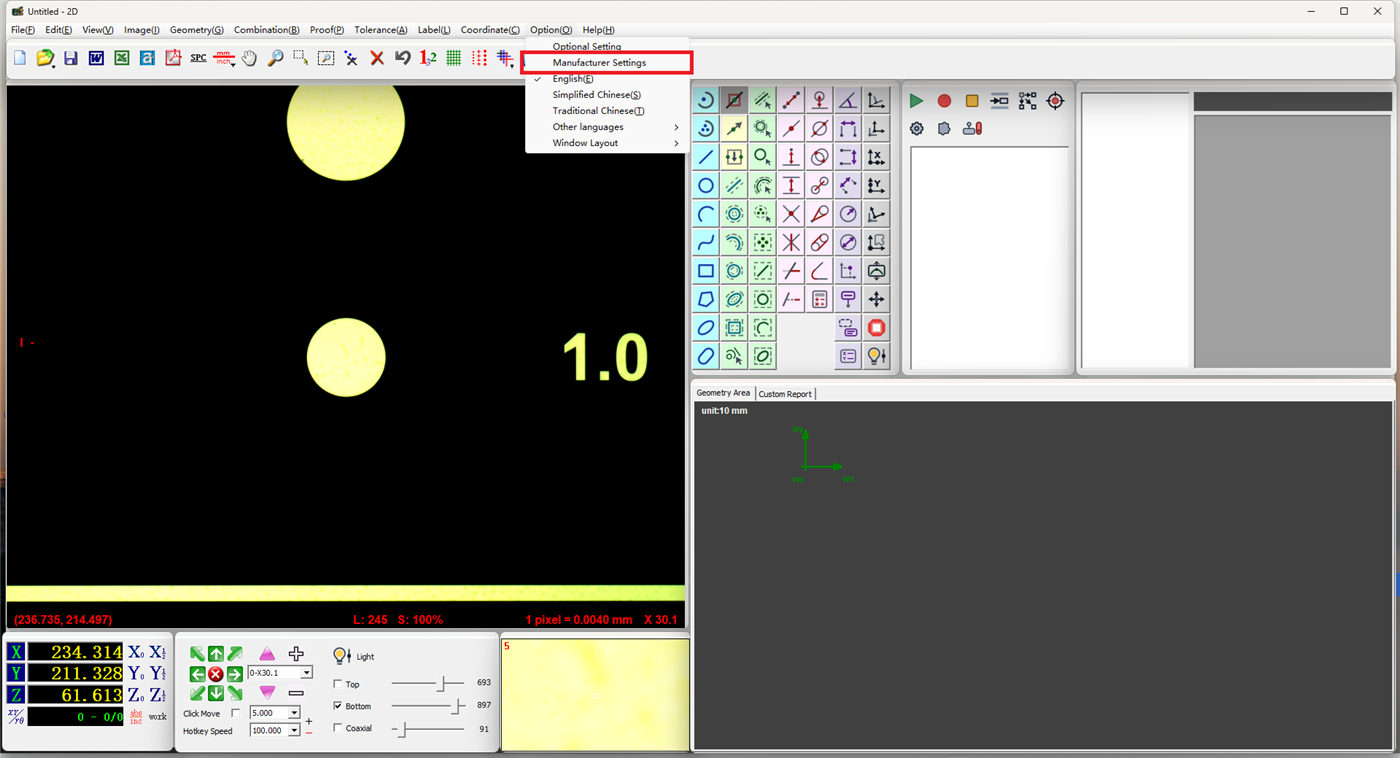
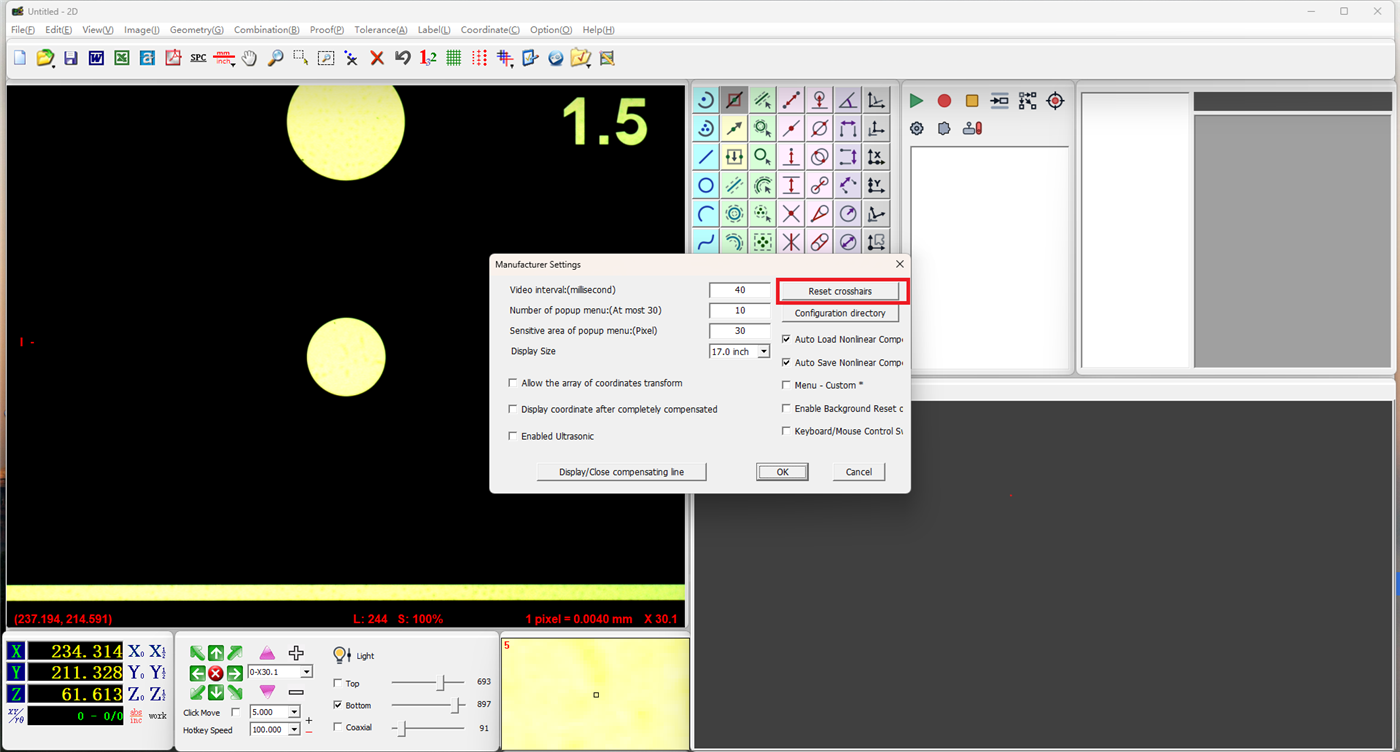
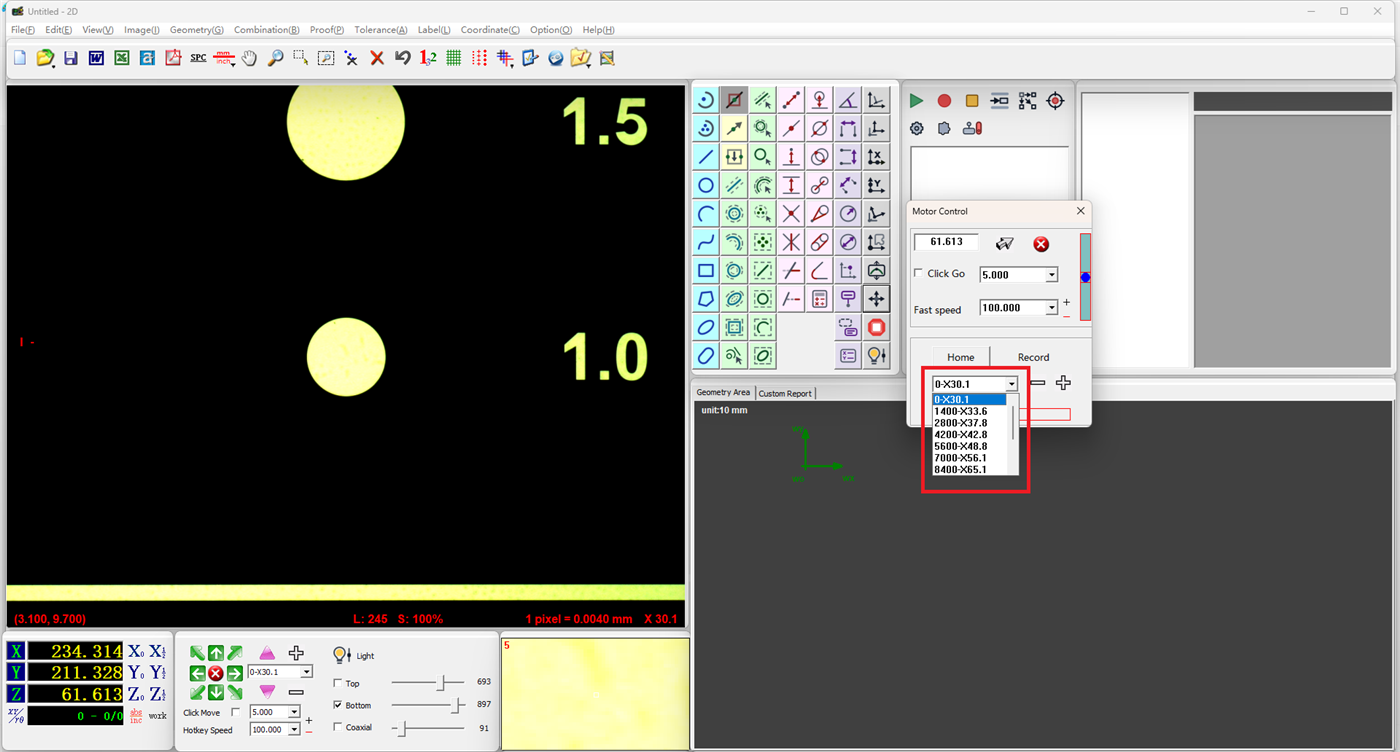
Step 2: Confirm Magnification Calibration
Ensure that all zoom lens magnifications have been calibrated.
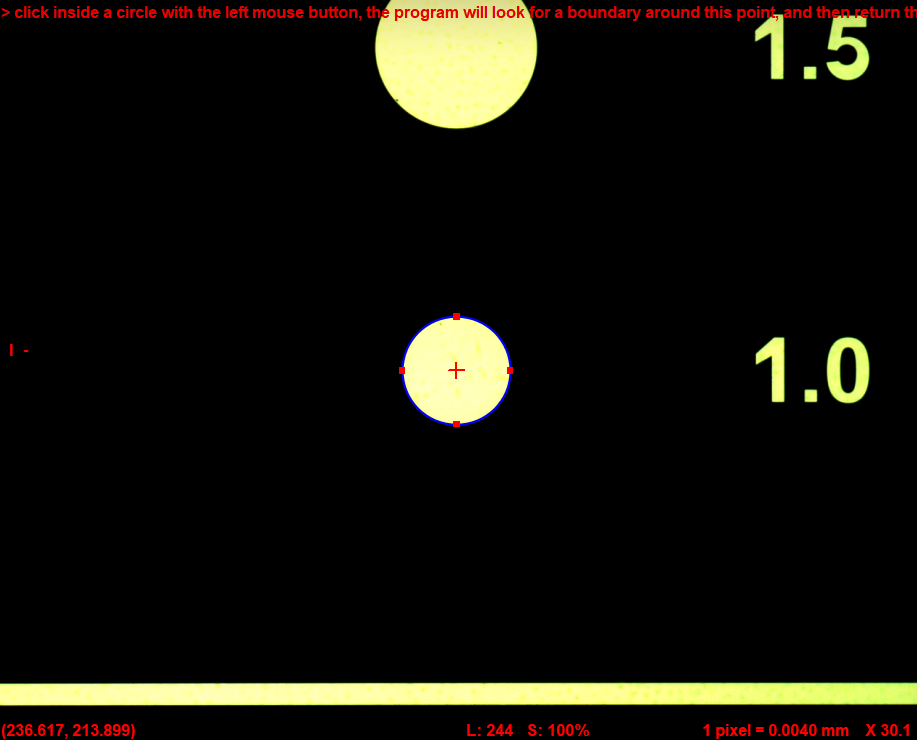
Step 3: Measure the Reference Circle
Measure any reference circle with a diameter no larger than 1 mm.
Step 4: Enter Automatic Lens Calibration
- Click Calibration in the menu bar
- Select Auto Lens Calibration
- Select Square Calibration Target
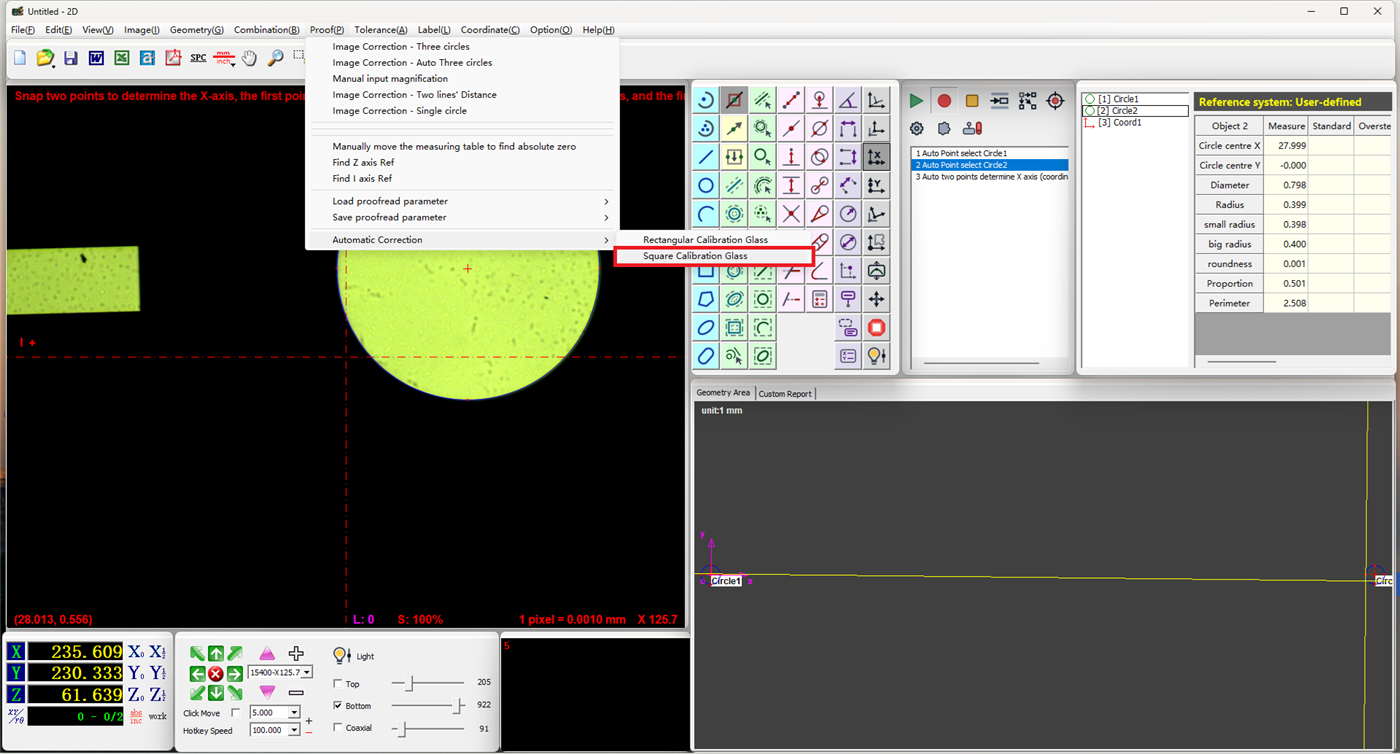
Step 5: Select Reference Circle and Calibrate
- In the calibration interface, select the corresponding reference circle
- Click the Calibrate button
- The software will automatically complete the concentricity calibration
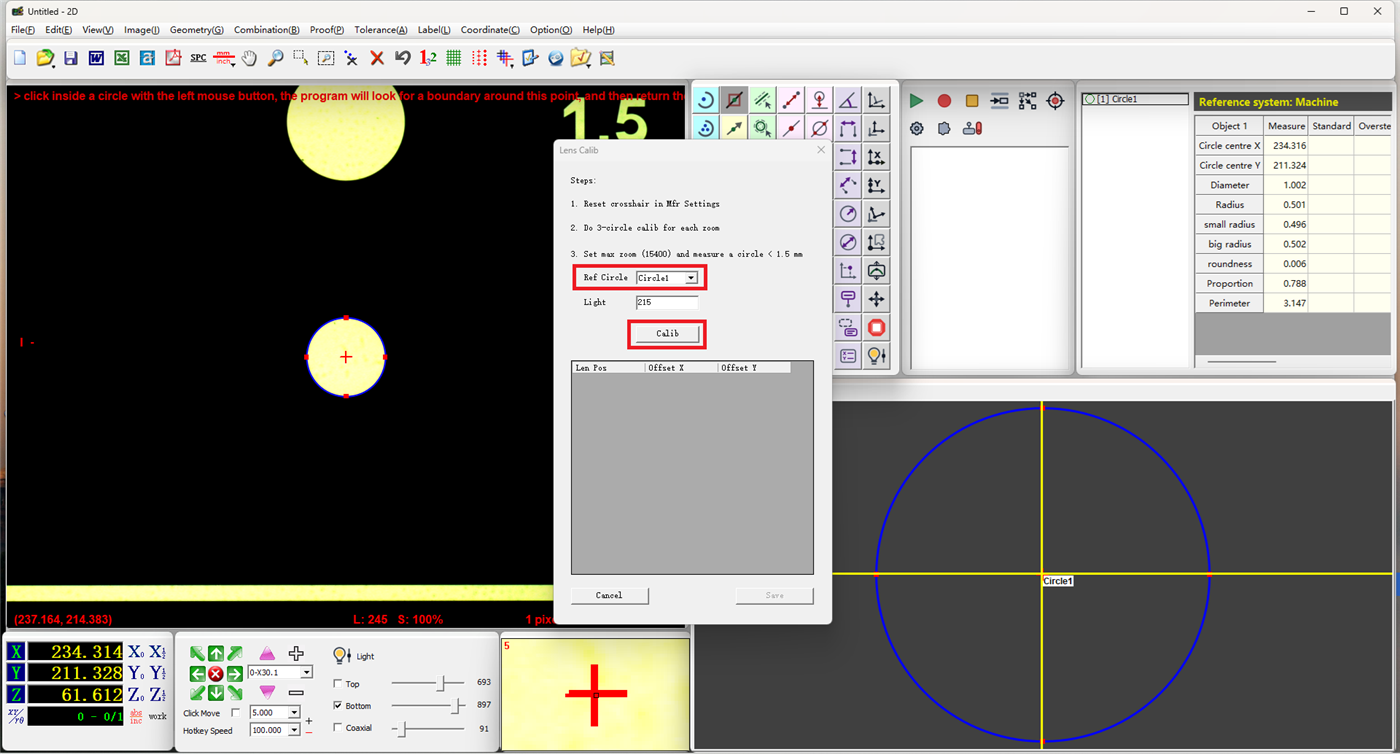
Verification
After calibration is complete, you can check the calibration status for each magnification in the relevant interface to confirm that concentricity calibration has taken effect.
Notes
- All magnifications must be calibrated before performing concentricity calibration; otherwise, the results may be inaccurate
- The reference circle diameter should be no larger than 1 mm
- Exercise caution when modifying parameters in manufacturer settings — it is recommended to proceed under the guidance of a qualified professional or the supplier
- After calibration, perform verification measurements at different magnifications